안드로이드의 카메라 화면을 실시간으로 가져와보자.
Canvas 설정
먼저, RawImage 컴포넌트를 Canvas 상에 배치해야한다. 이 컴포넌트에 카메라 화면을 담을 것이다.

Canvas를 생성하고, 자식으로 RawImage를 생성했다.
이때, Pivot은 따로 건드리지 말자. 나중에 스크립트에서 Width와 Height를 직접 조절할 것이기 때문이다.
※ CanvasScaler의 UI Scale Mode는 Constant Pixel Size로 지정해준다.
Script 작성
[Header("Setting")]
public Vector2 requestedRatio; //설정하고자 하는 카메라 비율
public int requestedFPS; //설정하고자 하는 프레임

[Header("Component")]
public RawImage webCamRawImage; //Canvas에 올려둔 RawImage

[Header("Data")]
public WebCamTexture webCamTexture; //Camera 화면을 지닌 Texture
일단, 필요한 변수부터 생성해준다. 접근 지정자를 public으로 두어 inspector에서 설정할 수 있다.
여기서 핵심은 WebCamTexture인데, 원하는 카메라의 화면을 지속해서 갱신하여 지니게 된다.
private void Start()
{
    SetWebCam();
}
private void SetWebCam() //WebCam을 지정하는 함수
{
    if (Permission.HasUserAuthorizedPermission(Permission.Camera)) //이미 카메라 권한을 획득한 경우에는
        CreateWebCamTexture(); //WebCamTexture를 생성하는 함수 바로 실행
    else //카메라 권한이 없는 경우에는
    {
        PermissionCallbacks permissionCallbacks = new();
        permissionCallbacks.PermissionGranted += CreateWebCamTexture; //권한 획득 후 실행될 함수로 WebCamTexture를 생성하는 함수 추가
        Permission.RequestUserPermission(Permission.Camera, permissionCallbacks); //카메라 권한을 요청
    }
}
Start문에서 WebCam을 지정할 수 있도록 함수를 구현한다.
만약, 카메라 권한이 없을 경우에는 권한을 획득한 후, CreateWebCamTexture 함수를 실행할 수 있도록 한다.
※ CreateWebCamTexture 함수는 아래에서 구현한다.
private void CreateWebCamTexture(string permissionName = null) //WebCamTexture를 생성하는 함수
{
    if (webCamTexture) //이미 WebCamTexture가 존재하는 경우에는
    {
        Destroy(webCamTexture); //삭제한다 (메모리 관리)
        webCamTexture = null;
    }

    WebCamDevice[] webCamDevices = WebCamTexture.devices; //현재 접근할 수 있는 카메라 기기들을 모두 가져온다
    if (webCamDevices.Length == 0) return; //만약, 카메라가 없다면 종료

    int backCamIndex = -1; //후방 카메라를 저장하기 위한 변수
    for (int i = 0, l = webCamDevices.Length; i < l; ++i) //카메라를 탐색하면서
    {
        if (!webCamDevices[i].isFrontFacing) //후방 카메라를 발견하면
        {
            backCamIndex = i; //인덱스 저장
            break; //반복문 빠져나오기
        }
    }

    if (backCamIndex != -1) //후방 카메라를 발견했으면
    {
        int requestedWidth = Screen.width; //설정하고자 하는 가로 픽셀 변수 선언 (현재 화면의 가로 픽셀을 기본값으로 지정)
        int requestedHeight = Screen.height; //설정하고자 하는 세로 픽셀 변수 선언 (현재 화면의 세로 픽셀을 기본값으로 지정)
        for (int i = 0, l = webCamDevices[backCamIndex].availableResolutions.Length; i < l; ++i) //현재 선택된 후방 카메라가 활용할 수 있는 해상도를 탐색하면서
        {
            Resolution resolution = webCamDevices[backCamIndex].availableResolutions[i];
            if (GetAspectRatio((int)requestedRatio.x, (int)requestedRatio.y).Equals(GetAspectRatio(resolution.width, resolution.height))) //설정하고자 하는 비율과 일치하는 해상도를 발견하면
            {
                requestedWidth = resolution.width; //설정하고자 하는 가로 픽셀로 지정
                requestedHeight = resolution.height; //설정하고자 하는 세로 픽셀로 지정
                break; //반복문 빠져나오기
            }
        }

        webCamTexture = new WebCamTexture(webCamDevices[backCamIndex].name, requestedWidth, requestedHeight, requestedFPS); //카메라 이름으로 WebCamTexture 생성
        webCamTexture.filterMode = FilterMode.Trilinear;
        webCamTexture.Play(); //카메라 재생

        webCamRawImage.texture = webCamTexture; //RawImage에 할당하기
    }
}
private string GetAspectRatio(int width, int height, bool allowPortrait = false) //비율을 반환하는 함수
{
    if (!allowPortrait && width < height) Swap(ref width, ref height); //세로가 허용되지 않는데, (가로 < 세로)이면 변수값 교환
    float r = (float)width / height; //비율 저장
    return r.ToString("F2"); //소수점 둘째까지 잘라서 문자열로 반환
}
private void Swap<T>(ref T a, ref T b) //두 변수값을 교환하는 함수
{
    T tmp = a;
    a = b;
    b = tmp;
}
이 부분은 조금 길지만, 별로 어렵지는 않다.
사용할 수 있는 카메라를 탐색하면서, 조건에 맞는 비율의 해상도로 WebCamTexture를 생성하는 것이다.
※ 요즘 안드로이드 스마트폰의 카메라 수(WebCamTexture.devices)는 지원하는 배율 개수에 따라 달라진다.
(x1, x0.5, x2, 셀카, ...)
※ 카메라를 탐색하면서 최초로 조건에 일치하는 후방 카메라의 배율은 대부분 x1이다.
private void Update()
{
    UpdateWebCamRawImage();
}
private void UpdateWebCamRawImage() //RawImage를 관리하는 함수
{
    if (!webCamTexture) return; //WebCamTexture가 존재하지 않으면 종료

    int videoRotAngle = webCamTexture.videoRotationAngle;
    webCamRawImage.transform.localEulerAngles = new Vector3(0, 0, -videoRotAngle); //카메라 회전 각도를 반영

    int width, height;
    if (Screen.orientation == ScreenOrientation.Portrait || Screen.orientation == ScreenOrientation.PortraitUpsideDown) //세로 화면이면
    {
        width = Screen.width; //가로를 고정하고
        height = Screen.width * webCamTexture.width / webCamTexture.height; //WebCamTexture의 비율에 따라 세로를 조절
    }
    else //가로 화면이면
    {
        height = Screen.height; //세로를 고정하고
        width = Screen.height * webCamTexture.width / webCamTexture.height; //WebCamTexture의 비율에 따라 가로를 조절
    }

    if (Mathf.Abs(videoRotAngle) % 180 != 0f) Swap(ref width, ref height); //WebCamTexture 자체가 회전되어있는 경우 가로/세로 값을 교환
    webCamRawImage.rectTransform.sizeDelta = new Vector2(width, height); //RawImage의 size로 지정
}
마지막으로 Update문이다.
RawImage의 사이즈와 회전을 처리하기 위한 함수를 작성한다. 특히, AutoRotation인 경우에도 반응형으로 처리할 수 있도록 가로/세로로 분기를 나누었다.
※ WebCamTexture 내부적으로 회전이 일어나는 경우가 있기 때문에 Swap 처리를 따로 했다.
※ webCamTexture.videoRotationAngle은 WebCamTexture 생성과 동시에 할당되지 않으므로, Update에서 처리하는 것이 적절하다.
스크립트 풀버전은 접어서 아래에 두었다.
using UnityEngine;
using UnityEngine.UI;
using UnityEngine.Android;
public class WebCamController : MonoBehaviour
{
[Header("Setting")]
public Vector2 requestedRatio; //설정하고자 하는 카메라 비율
public int requestedFPS; //설정하고자 하는 프레임
[Header("Component")]
public RawImage webCamRawImage; //Canvas에 올려둔 RawImage
[Header("Data")]
public WebCamTexture webCamTexture; //Camera 화면을 지닌 Texture
private void Start()
{
SetWebCam();
}
private void SetWebCam() //WebCam을 지정하는 함수
{
if (Permission.HasUserAuthorizedPermission(Permission.Camera)) //이미 카메라 권한을 획득한 경우에는
CreateWebCamTexture(); //바로 WebCamTexture를 생성하는 함수 실행
else //카메라 권한이 없는 경우에는
{
PermissionCallbacks permissionCallbacks = new();
permissionCallbacks.PermissionGranted += CreateWebCamTexture; //권한 획득 후 실행될 함수로 WebCamTexture를 생성하는 함수 추가
Permission.RequestUserPermission(Permission.Camera, permissionCallbacks); //카메라 권한을 요청
}
}
private void CreateWebCamTexture(string permissionName = null) //WebCamTexture를 생성하는 함수
{
if (webCamTexture) //이미 WebCamTexture가 존재하는 경우에는
{
Destroy(webCamTexture); //삭제한다 (메모리 관리)
webCamTexture = null;
}
WebCamDevice[] webCamDevices = WebCamTexture.devices; //현재 접근할 수 있는 카메라 기기들을 모두 가져온다
if (webCamDevices.Length == 0) return; //만약, 카메라가 없다면 종료
int backCamIndex = -1; //후방 카메라를 저장하기 위한 변수
for (int i = 0, l = webCamDevices.Length; i < l; ++i) //카메라를 탐색하면서
{
if (!webCamDevices[i].isFrontFacing) //후방 카메라를 발견하면
{
backCamIndex = i; //인덱스 저장
break; //반복문 빠져나오기
}
}
if (backCamIndex != -1) //후방 카메라를 발견했으면
{
int requestedWidth = Screen.width; //설정하고자 하는 가로 픽셀 변수 선언 (현재 화면의 가로 픽셀을 기본값으로 지정)
int requestedHeight = Screen.height; //설정하고자 하는 세로 픽셀 변수 선언 (현재 화면의 세로 픽셀을 기본값으로 지정)
for (int i = 0, l = webCamDevices[backCamIndex].availableResolutions.Length; i < l; ++i) //현재 선택된 후방 카메라가 활용할 수 있는 해상도를 탐색하면서
{
Resolution resolution = webCamDevices[backCamIndex].availableResolutions[i];
if (GetAspectRatio((int)requestedRatio.x, (int)requestedRatio.y).Equals(GetAspectRatio(resolution.width, resolution.height))) //설정하고자 하는 비율과 일치하는 해상도를 발견하면
{
requestedWidth = resolution.width; //설정하고자 하는 가로 픽셀로 지정
requestedHeight = resolution.height; //설정하고자 하는 세로 픽셀로 지정
break; //반복문 빠져나오기
}
}
webCamTexture = new WebCamTexture(webCamDevices[backCamIndex].name, requestedWidth, requestedHeight, requestedFPS); //카메라 이름으로 WebCamTexture 생성
webCamTexture.filterMode = FilterMode.Trilinear;
webCamTexture.Play(); //카메라 재생
webCamRawImage.texture = webCamTexture; //RawImage에 할당하기
}
}
private string GetAspectRatio(int width, int height, bool allowPortrait = false) //비율을 반환하는 함수
{
if (!allowPortrait && width < height) Swap(ref width, ref height); //세로가 허용되지 않는데, (가로 < 세로)이면 변수값 교환
float r = (float)width / height; //비율 저장
return r.ToString("F2"); //소수점 둘째까지 잘라서 문자열로 반환
}
private void Swap<T>(ref T a, ref T b) //두 변수값을 교환하는 함수
{
T tmp = a;
a = b;
b = tmp;
}
private void Update()
{
UpdateWebCamRawImage();
}
private void UpdateWebCamRawImage() //RawImage를 관리하는 함수
{
if (!webCamTexture) return; //WebCamTexture가 존재하지 않으면 종료
int videoRotAngle = webCamTexture.videoRotationAngle;
webCamRawImage.transform.localEulerAngles = new Vector3(0, 0, -videoRotAngle); //카메라 회전 각도를 반영
int width, height;
if (Screen.orientation == ScreenOrientation.Portrait || Screen.orientation == ScreenOrientation.PortraitUpsideDown) //세로 화면이면
{
width = Screen.width; //가로를 고정하고
height = Screen.width * webCamTexture.width / webCamTexture.height; //WebCamTexture의 비율에 따라 세로를 조절
}
else //가로 화면이면
{
height = Screen.height; //세로를 고정하고
width = Screen.height * webCamTexture.width / webCamTexture.height; //WebCamTexture의 비율에 따라 가로를 조절
}
if (Mathf.Abs(videoRotAngle) % 180 != 0f) Swap(ref width, ref height); //WebCamTexture 자체가 회전되어있는 경우 가로/세로 값을 교환
webCamRawImage.rectTransform.sizeDelta = new Vector2(width, height); //RawImage의 size로 지정
}
}
Script 추가
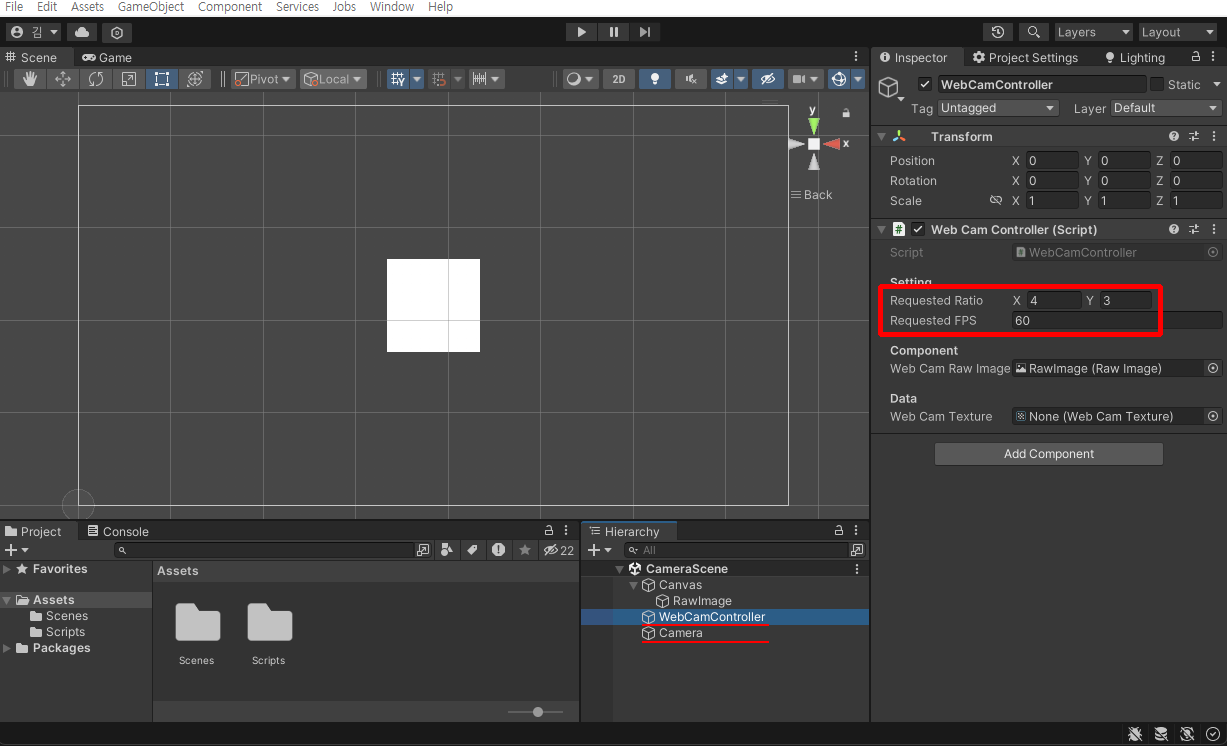
이제 작성한 스크립트를 Scene에 올려주고, Camera도 생성해서 올려준다.
비율은 4:3, 프레임은 60으로 설정했다.
RawImage 컴포넌트도 드래그 앱 드롭해준다.
※ 비율은 4:3이나 3:4나 동일하도록 내부적으로 처리되어있다(GetAspectRatio 함수 참조).
※ Camera는 여백이 깜빡이는 경우도 있기 때문에 추가해주었다.
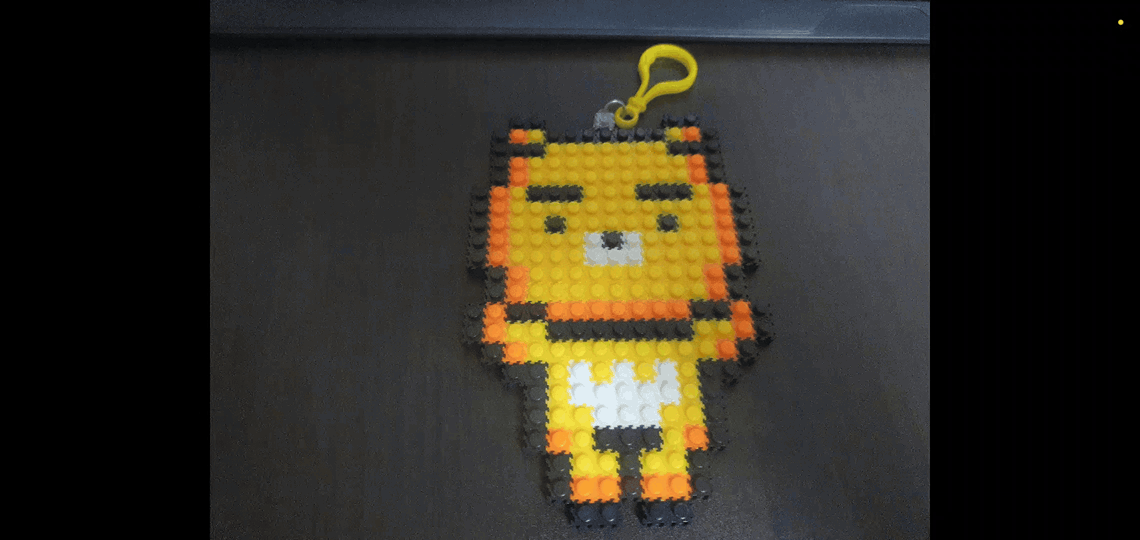
▼ Portrait.gif
▼ Landscape.gif
▼ AutoRotation.gif
잘 작동하는 것을 볼 수 있다.
화질이 떨어지는 점은 양해바란다. 폰을 바꿀 때가 됐다.
'[Unity]' 카테고리의 다른 글
| [Unity] 간단히 메모리 변조 방지하기 - 안티 치트(Anti Cheat) (28) | 2023.08.20 |
|---|---|
| [Unity] GPS 기능으로 위도와 경도 불러오기 (0) | 2023.08.20 |
| [Unity] EditorGUI를 활용한 커스텀 에디터 만들기 (0) | 2023.04.25 |
| [Unity] GameObject의 경로를 반환하는 함수 (0) | 2023.02.26 |
| [Unity] 구글 애드몹 보상형 광고 구현 (0) | 2023.01.17 |


댓글