Edit > Shortcuts 탭을 클릭하면, 기본으로 제공하는 단축키들을 확인할 수 있다.
이 외에도, 필요한 함수를 구현하여 단축키로 실행되게끔 할 수도 있다.
이번 글에서는 단축키를 생성해보고,
예시 코드 몇 가지를 살펴보도록 하겠다.
단축키 생성하기
우선 단축키가 에디터의 기능이므로,
예약 폴더인 Editor 폴더 내에 스크립트가 생성되어야 한다.
※ Editor 폴더 내에 있는 에셋들은 빌드 시 포함되지 않는다.
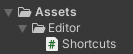
위와 같이 Editor 폴더 내에 스크립트를 생성해준다.
※ 스크립트 이름은 마음대로 해도 된다.
그리고 아래와 같이 예시 코드를 작성한다.
#if UNITY_EDITOR //Editor에서만 컴파일
using UnityEngine;
using UnityEditor;

public class Shortcuts : Editor
{
    [MenuItem("Shortcuts/Count GameObjects %t")]
    public static void CountGameObjects() //선택된 게임 오브젝트들의 개수를 콘솔창에 출력하는 함수
    {
        Debug.Log($"선택된 게임 오브젝트는 {Selection.gameObjects.Length}개 입니다.");
    }
}
#endif
여기서 주목해야할 것은 static으로 선언된 함수 위의 MenuItem 속성이다.
MenuItem이란 에디터 상단 메뉴를 추가할 수 있는 속성이다.
위와 같이 속성을 추가하면 아래와 같이 나타난다.

여기서 '%t'가 단축키를 지정하는 부분인데, 이는 Ctrl + T를 의미한다.
이 단축키를 누르면 작성한 함수가 실행되는 것이다.
그렇다면, 단축키는 어떻게 지정할 수 있을까?
키 조합 매뉴얼은 아래와 같다.
| 조합키 % : Ctrl or Cmd(Mac OS) ^ : Ctrl # : Shift & : Alt _ : 조합키가 필요하지 않은 경우 |
| 특수문자 LEFT, RIGHT, UP, DOWN, F1~F12, HOME, END, PGUP, PGDN, INS, DEL, TAB, SPACE |
| 예시 Shift+Alt+G 단축키를 가진 메뉴를 만들려면 "MyMenu/Do Something #&g"를 사용하고, G키만 사용하려면 "MyMenu/Do Something _g"를 사용한다. |
단축키를 지정하고 나면, Edit > Shortcuts에 자동으로 바인딩된다.
※ 기존 단축키와 충돌이 일어날 경우에는 경고 문구가 뜨므로,
단축키를 변경하거나 기존 단축키를 삭제하자.
위 스크립트에서는 하나의 함수만을 작성했지만 여러 함수를 추가해도 된다.
예시 코드 1
    [MenuItem("Shortcuts/Create Sphere %&s")] //Ctrl + Alt + S
    public static void CreateSphere() //씬 카메라 정면에 구를 생성하는 함수
    {
        Transform sceneCamera = SceneView.lastActiveSceneView.camera.transform; //씬 카메라의 트랜스폼 저장

        GameObject sphere = GameObject.CreatePrimitive(PrimitiveType.Sphere); //Sphere 생성 후,
        sphere.transform.position = sceneCamera.TransformPoint(Vector3.forward); //씬 카메라의 정면으로 배치
    }
예시 코드 2
    [MenuItem("Shortcuts/Move To Root %&r")] //Ctrl + Alt + R
    public static void MoveToRoot() //게임 오브젝트의 부모를 루트로 변경하는 함수
    {
        Transform[] selectedObjects = System.Array.ConvertAll(Selection.gameObjects, go => go.transform); //선택된 오브젝트들의 Transform을 저장
        for (int i = 0, l = selectedObjects.Length; i < l; ++i) //선택된 오브젝트의 개수만큼 반복
        {
            selectedObjects[i].SetParent(null); //루트로 이동
            selectedObjects[i].SetAsFirstSibling(); //첫 번째로 순서 변경
        }
    }
+ Undo 기능 추가
실제로 단축키를 만들어서 사용해보면 단점이 한 가지 존재한다.
되돌리기(Undo)를 지원하지 않는다는 것이다.
만약, 단축키로 게임오브젝트를 생성했다면,
Ctrl + Z를 눌러도 오브젝트가 사라지지 않는 것이다.
반대도 마찬가지이다.
그래서 Undo 클래스로 오브젝트를 기록하고,
전용 함수를 사용해 Undo 스택에 쌓아야한다.
예시 코드 1, 2번을 수정해보도록 하자.
수정된 예시코드 1
    [MenuItem("Shortcuts/Create Sphere %&s")]
    public static void CreateSphere()
    {
        Transform sceneCamera = SceneView.lastActiveSceneView.camera.transform;

        GameObject sphere = GameObject.CreatePrimitive(PrimitiveType.Sphere);
        Undo.RegisterCreatedObjectUndo(sphere, "Sphere Create"); //생성된 Sphere 오브젝트를 기록
        sphere.transform.position = sceneCamera.TransformPoint(Vector3.forward);
        Undo.RecordObject(sphere.transform, "Sphere Position"); //Sphere의 Transform을 기록
    }
생성된 구 오브젝트가 다시 사라지는 것을 볼 수 있다.
수정된 예시코드 2
    [MenuItem("Shortcuts/Move To Root %&r")]
    public static void MoveToRoot()
    {
        Transform[] selectedObjects = System.Array.ConvertAll(Selection.gameObjects, go => go.transform);
        for (int i = 0, l = selectedObjects.Length; i < l; ++i)
        {
            Undo.SetTransformParent(selectedObjects[i], null, "Set Parent"); //Undo의 SetParent 함수
            Undo.SetSiblingIndex(selectedObjects[i], 0, "Set Sibling"); //Undo의 SetSiblingIndex 함수
        }
    }
이전 부모로 재설정되는 것을 볼 수 있다.
#if UNITY_EDITOR
using UnityEngine;
using UnityEditor;
public class Shortcuts : Editor
{
[MenuItem("Shortcuts/Count GameObjects %t")]
public static void CountGameObjects()
{
Debug.Log($"선택된 게임 오브젝트는 {Selection.gameObjects.Length}개 입니다.");
}
[MenuItem("Shortcuts/Create Sphere %&s")]
public static void CreateSphere()
{
Transform sceneCamera = SceneView.lastActiveSceneView.camera.transform;
GameObject sphere = GameObject.CreatePrimitive(PrimitiveType.Sphere);
Undo.RegisterCreatedObjectUndo(sphere, "Sphere Create");
sphere.transform.position = sceneCamera.TransformPoint(Vector3.forward);
Undo.RecordObject(sphere.transform, "Sphere Position");
}
[MenuItem("Shortcuts/Move To Root %&r")]
public static void MoveToRoot()
{
Transform[] selectedObjects = System.Array.ConvertAll(Selection.gameObjects, go => go.transform);
for (int i = 0, l = selectedObjects.Length; i < l; ++i)
{
Undo.SetTransformParent(selectedObjects[i], null, "Set Parent");
Undo.SetSiblingIndex(selectedObjects[i], 0, "Set Sibling");
}
}
}
#endif
반복 작업을 단순히 처리할 수 있는 것만으로도 시간을 절약할 수 있을 것이다.
많은 개발자들이 귀찮은 일을 단축키로 처리했으면 한다.
https://github.com/Giseung30/Unity_Custom_Shortcuts
GitHub - Giseung30/Unity_Custom_Shortcuts: 유니티 단축키를 직접 만들어보자
유니티 단축키를 직접 만들어보자. Contribute to Giseung30/Unity_Custom_Shortcuts development by creating an account on GitHub.
github.com
※ 개발하면서 쓸만한 단축키들을 레포지토리에 업데이트할 예정이다.
'[Unity]' 카테고리의 다른 글
| [Unity] UI 모양을 내 맘대로 바꿔보자(VertexHelper) (50) | 2024.04.21 |
|---|---|
| [Unity] 동적으로 메쉬 병합하기(CombineMeshes) (33) | 2024.03.04 |
| [Unity] 자유시점 카메라 구현하기 (26) | 2024.01.02 |
| [Unity] 동적 Mesh로 포물선(Parabola) 그리기 (25) | 2023.12.30 |
| [Unity] Mesh를 생성하여 도형 만들기 (20) | 2023.12.18 |


댓글